Sunday, November 23, 2014

My Jacob's Ladder Project, # 5

It's been awhile and I've actually moved along with the Jacob's Ladder Project.  The one color blocks have all been finished and rows are being sewn together.  Should have that done today.  It kind of drives me nuts that it's taken over 2 years to get to this point as just 15 years ago, it would have only taken me a week or two to put the top together.

There were 41 blocks made but only 36 were needed to finish.  It seems that a couple of colors were repeated but I only used 1 of those twice in the finished top.

The following is a picture of the blocks in my final arrangement.  It was a struggle even getting the blocks in this order.  One can really have quite a few combinations.  This setting was picked because I liked the way it looked.  The next two J.L. quilts will be put together according to the way the old quilt was put together, with sashing and cornerstones.

The next step will be to add a border.  At the rate I do that, it might take another two years.  Let's hope NOT!

Continued in Part #6

Sunday, June 29, 2014

random

Looks like I need to post a little more often.  Time flew by and also had trouble bringing up page when I wanted to, not once, but several times this month.  Finally had a little more rain this month, but not enough to make a difference in the lake level but enough to make the grass green and the plants grow, and the grasshoppers take over.  Why do they seem to want to take over every year?  I'm thinking that I will need a greenhouse to grow anything edible just so I can keep them out.

Monday, May 26, 2014

My Border Blocks on my "Friends in the Garden" quilt

Nineteen years ago, I started a quilt and finished it in a reasonable amount of time, even with hand quilting it! The blocks were part of a quilt bee block exchange. Each month a different person in the bee would decide on the block pattern and have the members make blocks using a selected fabric with other fabrics added. That person would get those blocks.  The bee wasn't big enough to make the number of blocks needed so I did end up making more.  Once they were put together, I added my own border to it.


It is a stylized floral block border and I used a technique I had learned that past year - how to make flying geese the fast way.  Over these years, I've found that there are a number of quick ways to make flying geese blocks, all relatively simple, including a 3-Dimensional flying geese. They range from 2 different sized squares (which Eleanor Burns demonstrates in a video) to the square in a square method developed by Jodi Barrows.  You can find them all on the internet.

Some of the border blocks up close:


There are two basic blocks in the border.

Block #1
1:  The leaf or connecting block is a 4 patch of half square triangles in green and white with a top bar of the white background.  Some could have been made with two flying geese but to get the length I needed to make each side, it was necessary to make them as half square triangles so I could change size as needed and not lose the points of the leaves.


2: The 2nd block is the floral block; a unit  consisting of up to 3 flying geese blocks and a bar if needed.  From those flying geese blocks and the bar, I was able to get 8 + different floral looks by varying the placement of 4 colors: pink, darker pink, red, and white.  The placement of the green for the leaves was kept standard in all those floral blocks.  The only block arrangements I didn't use were #7 and #8.

Just varying the placement of the colors in each flying geese block changed the look of the "flower".

Here's the  starting blocks for those pictures.  Ones that you can copy, print,  and play with colors yourself:  They are NOT to correct size though and don't show the seam allowance, but just for you to see how color makes a difference.  There are 8 different settings but once you add color, they will seem to make even more.  Note that the bottom F.G. block is the same configuration in each, because plants have to have leaves.


Block #7 & #8 Not Used in border

When completed, the top was layered and then hand quilted by  some friends and myself then the quilt has since been used as a guest quilt.  Most of the center blocks were signed by the persons who made them; the quilters who helped me hand quilt, signed the leaves.  A label was then made for the back.   To personalize it even more, I've asked guests over the years to sign and date the floral border blocks when they stay overnight.  It's fun to read who in the family and my friends who have come for an overnight and when they did.


Friday, May 2, 2014

My Jacob's Ladder Project # 4

It's been a few weeks since I've posted on this project.  Not much accomplished other than all the fat quarters have been marked.  I ended up deciding to use my walking foot to finish the rest of the marked fat quarters as I found that that foot was the key to keep the lines straight for cutting.  However, I don't get to the project often, (like once a week if I'm lucky), so only 5 fat quarters have been cut so far.  Still have a bunch to sew and cut.

Last week attended my bee and kind of timed myself with sewing one fat quarter.  It takes about 20 minutes to do one.  Not long at all so why haven't I finished them by now?

I've been putting the Sewn and cut pieces in small zip lock bags.  1 bag for the one color blocks, 1 bag for the 2-color blocks, and the rest get put in the container for the scrappy j.l.  So, now it  looks like it's time to stop writing and get to work.

Continued in #5

A little walk in our back field


April 22, 2014:
Browsed the field today.  Found more plant damage from last week's hard frost.  It even hit the poison ivy on the fence line.  The Big Fruit Evening Primrose and the False Indigo Bush were also hit hard by the hard frost.  But others seemed to survive with no ill effect.  The Yuccas are getting ready to bloom and the Snow on the Prairie are coming up quite well where their parent plants were last year.  Will have to thin them out.

May 2, 2014

Looks like I didn't get back to finishing the above entry.  The frost damage has been overcome by most of the plants affected, with new leaves coming out.
and the flowers have been coming out in the lower field.  In the front, the Painted Daisies look like they'll be flowering by the end of next week.  We only had a couple of inches of rain last month so the ground is already dry.  Supposed to heat up later this week so no rain in sight yet.


Tuesday, April 8, 2014

My Jacob's Ladder Project # 3

After cutting the 2nd set of colors, decided that I'm going back to the old way of just cutting out the block strips first, then start the sewing.  or maybe I'll just try one more time and use the walking foot.  The difficulty with the larger fat quarter size fabric was trying to cut the blocks apart after sewing them.  The lines drawn seemed to shift about and I kept having to move the ruler to try and make a straight cut.  One whole line of the 2.5 inch blocks sewn turned out about a 1/16th to 1/8th of an inch off.  Too much and I'll have to make the seams smaller when I sew the next blocks to those.

continued in # 4

Friday, March 28, 2014

My Jacob's Ladder Project # 2

Yesterday spent time with my bee and took along the Jacob's Ladder project.  When my guild had it's quilt show, I had purchased a number fat quarters of different calicos from vendors there, enough to work on the 3 quilt tops that were already started. Then my brainstorm of marking the fabric in the last post.

It worked! though I wasn't so sure after marking the first one (probably because I was using the wrong marking tool).  I switched to a pencil for the 2nd one.  Thought I probably wouldn't continue that way but after sewing up the pieces for the first one, decided it was worth the time to mark the fabric and sew before cutting apart.  It was so easy to do though it took me two hours to get that first one marked, sewn, and cut.   The second one took half that time but I did have to take out some stitches because I was over enthused by the process and didn't watch closely where to stop and turn.

I did run into one problem when sewing on the diagonal.  The fabric appeared puffed up after the sewing was done.  At least I had over-sized the half square triangle units by 1/8 inch. I'll have to try the walking foot for the next one I mark up or change directions of the diagonals when I mark.  BTW, the colored fabric was layered with the background fabric in case you're wondering what's going on.  In this case I just used plain muslin.

Here's what it looked like after it was sewn and before I did the cutting.
Did decide that I didn't need to mark the cutting lines for the individual 2 1/2" squares as I can easily do that part when I'm cutting those 2 1/2" squares from the strips... after the strips have been sewn.

Looks like I might have to make another just so you can see the markings better and make the sewing more visible.

It was really nice though to be able to have most of the sewing done while uncut.  Next step will be to iron then sew the 4-patches together then build the block.  Oh, and the 1/2 square units will have to be slightly trimmed to correct size of 4 1/2" inches sq.

I haven't described the Jacob's ladder project that I'm doing.  The picture of the original old quilt is on the first part.

The first quilt will use one color blocks, probably without sashing but I might change my mind on that..  Then there will be two quilts with 2-color blocks similar to the old quilt, and the 4th quilt will be scrappy, mixing up all the colors that I've cut from these fat quarters.  The 2nd and 3rd will have sashing like the old quilt as will the scrappy one.

 I had to split up the 2-color blocks as I noticed that the light/dark ones didn't look good with the dark/light blocks so that is why there are two quilts being made with these.

These are some of the blocks I had finished up last year though in that picture, I was just playing around with the colors.

continued in # 3


Saturday, March 8, 2014

A couple of museum quilts from the Civil War.

Looks like I'll be missing the Dallas Quilt show this weekend but I did view a couple of old Civil War quilts at the Texas Civil War Museum in Fort Worth today.  You may click on the pics to view larger.

One was an impressive log cabin style quilt (Barn Raising pattern) with embroidery done along  the logs of the log cabins.  Every log seemed to have the same embroidery stitch called the Herringbone stitch, a stitch usually used to decoratively sew two patches together but in this case used as a lovely edging stitch.  The embroidery thread color of the dark "logs" varied with green, yellow, or red which highlights the embroidery.  White appeared to be the primary embroidery thread used in the white "logs."  The logs are in colors of red. green, or white as shown.


The other was in wool with triangular pieces, pre-stuffed and sewn in what looks like a quilt as you go.  The blocks are  4  triangles sewn together with 3 other like  units to form a pin wheel.  Then those blocks sewn together to form the quilt.  Since these quilts were behind glass, I couldn't quite see exactly how those triangle units were made.  It appears that the quilter  started with squares, folded diagonally, filled then pieced together with the next triangle unit.  The edges of the quilt look like this is exactly how they were formed.  It would have been a warm quilt.  The original recipient of this quilt was a young soldier in a Texas Calvary unit who survived the war.

If you ever visit Fort Worth, this museum is great and worth the visit.  It's on the  east side frontage road of  Interstate 820 on the west side of Fort Worth.  There is plenty to interest the males and the females of a family along with great descriptions of each item displayed.

I was particularly intrigued because part of the exhibit was about the "Sanitary Commission" organized by private citizens of the North to provide nursing care for the wounded.  A number of years ago, at the Dallas Quilt show, I happened to be walking past the area set aside for appraising peoples quilts.  A lady had brought in a particularly old family quilt that turned out to be made by women of the town of Skowhegan, Maine.  The quilt was a Civil War quilt.

 Each person adding blocks to the quilt had embroidered or hand-written their names on their blocks.  As I recall, somewhere on the quilt it mentioned the Sanitary Commission. I think it was being donated to the Commission to use.  I had wondered at the time what the Sanitary Commission was. Now I know.  I do not know what became of the quilt but the quilt owner had been looking for a museum back East to donate the quilt to as she  had no one to pass it on to and felt it was of historical significance.  It had been in her family for generations.

That quilt really intrigued me because I have relatives that have lived in or near Skowhegan, ME for my whole life, including one who had been the town clerk for many years.  I took some photos of that quilt but my skills with that camera at the time were not that great but I was able to make out names and sent several of the photos to my relative who recalled seeing many of those same names while she worked for the town.  If I can find those pictures again, I'll look them over again and post them here.  As I recall, it was a signature type block.  Each block had been made individually, layered and then bound, then all sewn together to make the quilt; another "quilt as you go."

update:  Since writing the above an hour ago, found a site via facebook of another blog that is about Civil War Quilts that may interest readers of this post.

Friday, February 28, 2014

Spring is coming

Took a short walk into the back field yesterday.  Rainey came with me.  She enjoys the walks down there.  She had already been scouting for mice or rats in the upper field but had not come across one so she joined my little walk so she could do some exploring on her own.     She doesn't let me get too far away before she starts calling out to me. Guess she just needs the reassurance that I haven't left her alone in the open.

 .  The area she is walking in, is bare Barnett Shale, full of ancient sea shells when this area was the bottom of an ocean.  There is plant life even there including a sandwort whose fresh, soft green leaves, harden to thorns as the summer heat on the bare ground kicks in.  Those soft green leaves have not come out yet but you can see that start of green on the stems.  They'll be in full bloom in  May, like a little bouquet of white sandwort flowers on the ground and the plant is still soft to the touch. Not so when that heat kicks in after the bloom is over.  No walking barefoot with these around.

I was searching for signs that spring is coming.  Found some bulbs leafing out.  There are 3 different types that come up in that part of the land.  None ready to bloom yet but found signs of all 3 coming up, all in the Lily family, onion types.

 Rainey is helping me find some of the perennial "Stemless Primroses" that were abundant last year in the lowest part of the field, just below the Barnett Shale outcropping. At left, in front of her toes and also in her leg shadow  you'll see the spent seedpods clumped together, still attached to the plant' stem.  There really is a stem but it doesn't do much growth so the flowers and seedpods are low to the ground.  The flowers are large when blooming, about 2 to 3 inches across.  Really pretty yellow when blooming. Some plants bloomed last year for a long period of time. Each bloom only lasts for a day, typical of the Primrose family.


Here's another Stemless Primrose but this one actually has a visible stem.  It was more sheltered than the ones that Rainey was standing next to.  I'll measure it the next time I'm down there.  Probably had more access to water & shade so it's stem lengthened somewhat as it bloomed.  You can see that it had quite a few blooms.
 This last picture is of another Stemless Primrose that I took numerous photos of last year. It also had numerous flowers and built up a long stem.  It, too, was quite sheltered from the sun rays as it received protection from that rotten, termite infested log that was sitting on the edge of an old wood pile.  It looks like some animal tore apart the log to try to find some food this winter.  The primrose is in the center of the picture, that lump next to some green grass.  I still need to cut off one of those old seed pods and see if there are any seed left inside that have scattered.  I've tried removing a pod in the past but that is one tough plant and fingernails just couldn't do the job of cutting through the fibers.

Tuesday, February 25, 2014

My Jacob's Ladder Quilt Project.

Tuesday and I'm finally ready to tackle some more projects.  One ongoing project has been putting together a number of Jacob's Ladder blocks to simulate an old family quilt.  I have 3 variations going on at the moment and decided that more blocks were needed for each variation.  Picked up more fabric for the blocks this past weekend at my guild's quilt show.  Had a little time to sit at the computer and figure out how many colored pieces that can be cut from 1 fat quarter (18" x 22").  Had to do it that way as my brain just doesn't seem to want to figure it out. Results show that I can make 3 single colored blocks from 1 fat quarter used with same amount of muslin or another light or dark color as the background.

I used 3 colors to show what is needed for each block.
The separate colors represent the colored pieces for 3 blocks with a little left over. Ideally, one would end up with 2 extra 2 1/2 " squares and a 2" strip for use elsewhere. plus a 1/2" strip as waste unless you're into using that small a scrap (maybe as a small package tie-wrap?).
This diagram is marked for making three 12 1/2" unfinished blocks which uses  4 half square triangle units per block  and  10 2 1/2" squares for the 4-patches per block.  You'd need the same amount for the background.

 The half square triangle units are marked as 5" blocks to start with to be layered with a 5" block of muslin then diagonal marked and 1/4" seam sewn on both sides of the diagonal line. Then cut apart on the diagonal line which leaves you with twoapproximately 4 1/2" half square triangle blocks (you'll need to trim the sides to fit to that 4 1/2" measurement).

hmmm!  I could layer the fat quarter with the muslin and get some of my sewing done before cutting it out.  All I'd have to do was mark the fabric a head of time!  I think I'll try that out and see how it works.

Meanwhile,  here's what 1 single color block looks like:


And here's a view of the old, well worn family quilt:
     
I've picked up some fabric to use as a sashing & corner stones for 2 of the 3 quilts I'm doing.  Haven't picked up fabric for the backing yet.  Not sure if  yellow will be used for the back.  Maybe on one or two of the quilts?

 Now to get on with my other projects for the day - posting the winning quilts from my guild's show on our website.

Continued in # 2

Thursday, February 13, 2014

Brushing again...

Had some repair sewing to do today.  Diamond came in to "help," first finding a ball of yarn to play with.  Had to stop and wind that up


That settled, sewing commenced.  Diamond got on the table to watch, then decided to go sleep behind the laptop for awhile.  Meanwhile, I was back to sewing and almost finished with the patch repair.  Just one more line of sewing.

 That's when Gypsum came in.  He did his usual. Sat and looked at me from the floor, then gave a little meow.  I relented and started brushing him. Oh, wait, I have to get that sewing done so I can get off to the P.O..  I stop brushing.  Gypsum is not happy and starts his paw routine.  I relent and brush a few strokes more.  He's really enjoying it.  I stop again and this time turn around quick and start sewing.  He's NOT happy.  He does the paw routine but this time stretches out the nails and then curls them in... in MY leg  I yell, he runs.  I grab the nail clippers, find him and give him a really needed nail trim and a few more brush strokes... which didn't interest him anymore.  So, back to finishing the patch repair and off to the P.O.


Tuesday, February 11, 2014

Update on Brushing

 A couple of glitches kept me from updating this last week.  Got those cleared up - well, one of them for good but the other is in limbo as far as I'm concerned.  Meanwhile back to brushing the cats.

Last week, Butch seemed to want to make daily brushing a part of his routine, too.  And now Diamond seems to think it's the THING to do!   Gypsum still comes in but we were gone for 4 days and Gypsum forgot to come in this morning though he made sure I brushed him 4 different times last night after we got home!  He has since come in this afternoon for those brushes.

Here's a sequence of photos of Butch getting his brushing.  I had to keep him from falling several times.
Butch really gets into being brushed.
Butch loves the brush around
his mouth and chin.

and rub on the sewing machine while the
 brush is going down his back.
Brushing those cheeks feels so good.

He just rolls with ecstasy, almost off the table

and ends with belly rubs, still trying to
 hold his balance on the table.


Diamond watched and when he was finished & left the room, she hopped up on the table and asked for some brushes.  But when the camera came out, she hid behind the laptop, content to give herself a bath.  I did manage to get a couple last week though.

Here's Diamond enjoying the chin rub.


Doesn't she look like she's really
 enjoying it?

Friday, January 31, 2014

Getting to some hand quilting...

     Just about ready to make this blog known. It's probably not going to be daily, more likely hit or miss for a while until I get used to doing a journal of sorts. Today has been spent tidying up the blog and learning about using it. Several posts have already been made since I opened up this blog. I've done some editing to them and might add some more photos to Gypsum's brush post. Hard to believe that he's been asking for a daily brushing since last September. Even I look forward to it and miss it when I'm gone for the day.

      I do want to make this a journal of quilting and the cats so will start off right now with my current projects. I'm in the last stages of a wall hanging made from charm squares I "won" on the RJR Fabrics Facebook page. It must be ready for my guild's quilt show in 3 weeks. Glad it's small as I've been slow at working on the hand quilting. Then I'll need to get the binding done and label made and a hanger tube for the quilt show. My plan today was to work on the quilting. fat chance that's going to happen since I'm here typing!


The quilt top is full of cat hair as Rainey used it for a sleeping spot for a few days before I decided I really needed to stop her from doing that. Will probably have to use the old tape method for cleaning off the cat hairs. It does not interfere with the quilting though as I can remove hair as I come across it.

   I also have a couple of other quilts in progress, both workshop quilts. One will also be in the show but it's needs are little, just a label and a hanging tube. Oh and there are some others that have needed finishing for two years. One needs a backing, then quilting, and the other needs quilting. I think both of those will be on the agenda for after the quilt show. Both will get done this year. After all, one is a wedding gift for a wedding that took place 2 years ago and they have already had their first child. The other was promised to my grandson. Have to hang my head for not getting that done two years ago as the cats have not made it easy to baste and quilt for the past year. Darn, then I think of the ufo's from YEARS past. There's a backlog there too.

Cat Hair on Quilts

If you have cats, you have to deal with cat hair unless you have an exotic cat breed that doesn't shed.  It gets on quilts, rugs, table tops; clings to mirrors, walls, etc...  Yet many quilters have cats and cats love quilts.  They are one of a cats favorite things to curl up on, dig under and in general, leave cat hair on. My cats are no exception to that rule.

For the most part, I try to keep my unused quilts stored in pillow cases and in a room the cats can rarely access.  For my hanging quilts, a few yells have kept them from climbing them more than once or twice and luckily, no visible damage that I've been able to find but the cat hair still clings to them.

 These cats are my first that have been wall, door, curtain, blinds, & quilt climbers. A few yells when caught in the act has curtailed that for the most part, however they still try to climb my design wall.  Lots of pock marks in it to mark how high they each have reached.  They have seemed to find it more fun to climb than anything.  I found that I eventually had to keep it filled with projects but even those they have tested as I've found bent pins, blocks on the floor or skewed on the wall with some blocks needing repair!  A couple of the culprits have turned their attention to climbing the trees when I let them outside so I don't see the design wall being used as often.

When it comes to cat hair though, that's another story altogether.

What do you do to control your cat's hair on your quilts?

How do you remove it?

You may leave your answers in the comments below.

.

Wednesday, January 29, 2014

Brushing the Cats:

Gypsum loves to be brushed.  So much so, that he comes into the computer room several times a day and begs to be brushed.

I use a special brush.  It didn't cost too much in today's prices and can be found at Walmart for around 7 or 8 dollars. I haven't checked the pet stores for their prices on this type of brush.  It's a plastic type brush with soft, thick bristles of a type of a bendable plastic. The tips are again coated with another layer of a plastic that thickens the tips and rounds them out.  It almost acts likes it's massaging their skin as I brush their coats and all my cats love it.

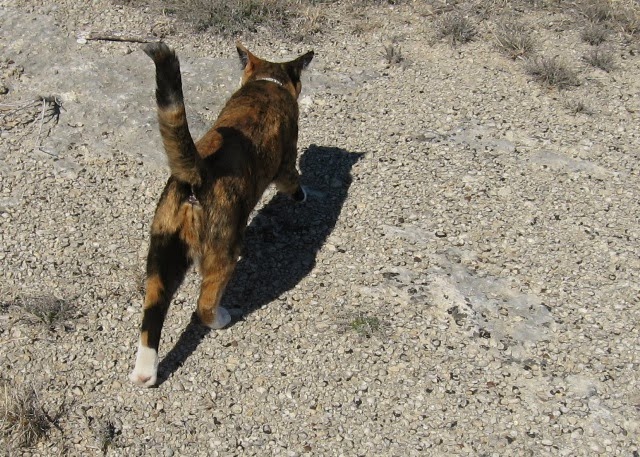
Here's a picture of Gypsum begging seriously for that brush to start doing it's work.
I bought the brush a year ago but didn't really start trying to brush the cats until last summer.  Gypsum took to it the best, quickly setting up a routine that I had to follow through on.  The others like it, too, but not enough to set up their own daily routine.  Gypsum hasn't skipped a day since the middle of last September -- unless we're out of town for a day or two.

It took them a bit to learn what the brush was about.  At first they didn't want it to touch them so I didn't get more than a stroke or two down their back before they'd move out of reach.  I'd wait a few days then try again.  Soon they realized what it was doing and how it felt and they decided it wasn't so bad after all and really did feel good.  They particularly like being brushed around by their cheeks and the top of their head, then I can move down their back and sides.  It took a little longer before any of them allowed me to brush their bellies, and even then I can only get in 1 or 2 strokes before they turn over or move on ...or grab my hand in rough play.

Since I don't have any long haired cats to brush, I can't tell you how well this brush works on long haired cats.  I'm only using it on short haired cats who really don't need much brushing at all since most brushing is aimed at keeping long hair from tangling and creating mats.  I've had long haired cats in the past but never this type of brush.  I think I used a comb at that time.  However, this brush does help some with the shorthairs constant shedding.

If you've never brushed a cat, it's most pleasant for them if you brush in the direction their fur is growing, normally front to back.  I occasionally will "back-brush" them, ie, brush in the opposite direction as this can catch some of the loose fur that is still clinging.  They barely tolerate this, so finish with the normal direction.

About Gypsum's routine:  He usually comes in soon after his breakfast, walks under my chair, gets between my feet as I sit staring at the computer, and looks at me.  He'll then give me a meow if I haven't noticed him yet.  If that doesn't work, he'll sit on his haunches and reach up and gently grab my right arm with his paws.  If that does't work, he'll pull down on my arm.  That usually works.  Then I start brushing and he starts purring and rubbing and positioning his body for the spots he wants brushed.  This will continue for about 5 or more minutes or until 1 of us tires.

Later in the day when he comes in, if he's not too serious about a brushing, he'll just come in, sit between my legs and meow.  If I don't respond immediately, he leaves and comes back later.  He's fast about leaving, too.  I will think it's only been seconds since that last meow and when I turn around to look for him, he's not in sight. 

If I stop when he thinks he's in the middle of a brushing session, he will do the routine in the picture above, grabbing my hand, "kissing" it with a lick.  If that isn't enough, he'll start "love nibbles", those tiny little nips with his front teeth.  That usually sways me as those little nibbles can turn into slightly stronger nibbles that have some pressure in them!  He will be purring the whole time.  Sometimes I will stop the brushing and just give his body a total massage.  He loves that, too.

Sometimes, Butch will come in while Gypsum is being brushed.  He'll want to be brushed, too.  He's not into a daily routine but when he does want that brush, he'll push Gypsum aside.  His brushing will last up to 10 minutes if I can last that long.  He prefers to get on the table next to me for his brushing and rolls around in ecstasy as I brush his entire body.  Of course, he purrs constantly and louder than Gypsum while this is going on.

Diamond and Goldie are not on a routine of any sorts, maybe once a week.  Both like their head done for the most par; the body, not so much.  Rainey rarely will sit for more than a couple of swipes of the brush but then she's also  not heavy into being petted either.

There is an album on Rainey's Cat Daze page on Facebook of the brushing routine that Gypsum goes through if you'd like to see more pictures.  Just click on photos, then albums under the header photo.  It's titled "Gypsum likes the brush."


Monday, January 20, 2014

The Cats on Quilts

If you view cats on facebook, you'll come across pages that talk about Caturday.  Many pages ask their viewers to post pictures of their cats on Saturday -- on quilts, or quilts about cats. So, here's your introduction to my 5 current Cats on Quilts (even though this is not Saturday!).

Rainey and Diamond on my first quilt

Goldie, all ready for Valentine's Day.
Butch  during a July 4th photo shoot.

Diamond, not really wanting me to sew!
Rainey  came to us  September 8 of 2012, a stray found by our neighboring friends. She's now about 2 years old since we don't know her birthday.  We had been without any cats for about 10 years so were happy to have a cat again.

 Rainey is a Character Cat.  She's a diva type, noisy when she wants to be and grumpy when she wants to be but still quite sweet. She's also very observant of her surroundings and where she wants to be and learns quickly.  She does not like to be touched by the other cats except when she is totally ready for it.  It's taken her quite awhile to even let them sniff noses with her even though she watched them grow up. Rarely does she allow Diamond to groom her. At the moment, Diamond is the only one that she allows that priviledge.

Goldie came along 6 weeks later, on October 24, 2012, quite pregnant and wanting a new home.  She found us on her own and at the right time as she dropped those kittens 2 hours later, after we got her situated in her own private room with all the food she needed and fresh water.  Her age is unknown but she appears to be older than Rainey.  Though she appears to be all black, she does have some white spots on her.  We named her for her golden eyes.

Butch, Diamond, and Gypsum are Goldie's babies, born a little over a year ago on October 24, 2012.  There were 6 in the litter and 3 of those are now in other homes.  They were all relatively healthy, beautiful little kittens.

Butch, the black and white is a lover and also a Momma's boy.  He nursed on Goldie until he was about 5 months old and she finally decided enough was enough.  Butch has a nub of a tail, and the stubby body type of the manx breed though we don't know who the father(s) were.

Diamond is my sweetheart.  She's taller than her Mom, Goldie, and built like Butch but her tail is a few inches longer with a bend in it that causes her tail to look like a little flag when she's holding it up.
She's a tomboy though and doesn't mind getting into scuffles with her two brothers.  She can out leap either of them with twists and turns like a ballerina.  She resembles the Manx breed in her body build and the Snowshoe Breed in her coloring.

Gypsum this past autumn.
Gypsum is a beautiful seal point.  He looks like a Siamese but definitely not a pure bred.  He is most graceful and a wonderful "gentleman".  Never demanding but he does know how to get his way if he really wants something.  He's the largest of the 5 cats now.  Has a full tail that he controls quite well.  He loves to be brushed and comes in to the computer/sewing room several times a day to be brushed, gently asking, first with a little meow, then a gentle grab of my arm with his 2 front paws.  If that doesn't work (I'm busy typing), he'll sometimes pull my arm down and give me some gentle nibbles on the hand.  Who can resist?!

Both Gypsum and Diamond have pale cream eyes with hints of blue/lavender.  Their pupils reflect red while Butch, Goldie, and Rainey with their yellow/orange eyes reflect green.  Sometimes I'll reduce the red-eye in photos so they don't look so scary.

You may view more stories and photos of my cats and their escapades on Facebook at Rainey's Cat Daze page.

Welcome!

 It's been awhile since I've had a blog and things have changed, so a little history about my past -- If I can keep it "little" HA!  I'll be experimenting for awhile 'til I get used to this program so you might see many changes along the way.

     My past.  I started out with a small website back in 1998 where I posted the quilts I had completed previous to that time, then added some pages about my other interests which I probably won't post here since I have a major website already about them and links to them through my facebook personal page. I still have my copies of those first pages so will incorporate those quilt pages into this blog as I see fit. Those first pages were kind of like a blog, before blogs came to be, in fact, my main website was almost bloglike as I created pages to match my experiences in those fields at the time. I usually spend my winters updating those pages, when nothing else is "pressing" me.

   That gets me to this blog.  As the title suggests, the focus here will be on cats, my cats specifically, and cover areas that my FB page about them, doesn't.  As previously mentioned, I'll also be posting about my quilting experiences, going back to where I started from on the web to the present.  If you've ever had cats, you'll understand their affinity to quilts, particularly NEW quilts, or quilts you are working on.

Maybe I'll even eventually be sharing or selling some of my original block patterns if I can get back into the swing of doing that.

  Now, where does the Texas part come into this.  I also love nature, specifically wild flowers.  My location is north central Texas so there will be posts about the local wildflowers.  It's hard to imagine the number of different wild flowers that grow on my little spot of Texas.  I am still amazed after living in this spot 7 years.

Time to sign off on this post as there is quilting to be done today!