Friday, February 28, 2014

Spring is coming

Took a short walk into the back field yesterday.  Rainey came with me.  She enjoys the walks down there.  She had already been scouting for mice or rats in the upper field but had not come across one so she joined my little walk so she could do some exploring on her own.     She doesn't let me get too far away before she starts calling out to me. Guess she just needs the reassurance that I haven't left her alone in the open.

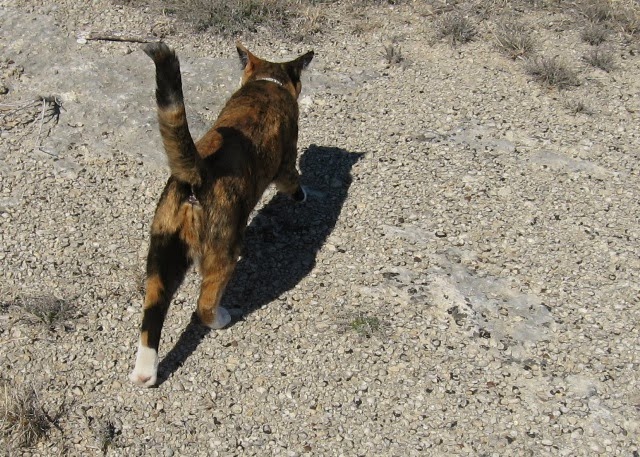
 .  The area she is walking in, is bare Barnett Shale, full of ancient sea shells when this area was the bottom of an ocean.  There is plant life even there including a sandwort whose fresh, soft green leaves, harden to thorns as the summer heat on the bare ground kicks in.  Those soft green leaves have not come out yet but you can see that start of green on the stems.  They'll be in full bloom in  May, like a little bouquet of white sandwort flowers on the ground and the plant is still soft to the touch. Not so when that heat kicks in after the bloom is over.  No walking barefoot with these around.

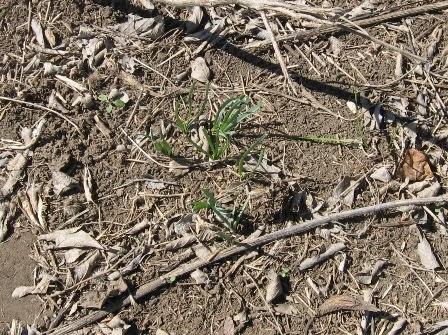
I was searching for signs that spring is coming.  Found some bulbs leafing out.  There are 3 different types that come up in that part of the land.  None ready to bloom yet but found signs of all 3 coming up, all in the Lily family, onion types.

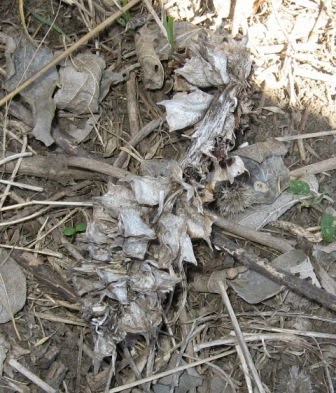
 Rainey is helping me find some of the perennial "Stemless Primroses" that were abundant last year in the lowest part of the field, just below the Barnett Shale outcropping. At left, in front of her toes and also in her leg shadow  you'll see the spent seedpods clumped together, still attached to the plant' stem.  There really is a stem but it doesn't do much growth so the flowers and seedpods are low to the ground.  The flowers are large when blooming, about 2 to 3 inches across.  Really pretty yellow when blooming. Some plants bloomed last year for a long period of time. Each bloom only lasts for a day, typical of the Primrose family.


Here's another Stemless Primrose but this one actually has a visible stem.  It was more sheltered than the ones that Rainey was standing next to.  I'll measure it the next time I'm down there.  Probably had more access to water & shade so it's stem lengthened somewhat as it bloomed.  You can see that it had quite a few blooms.
 This last picture is of another Stemless Primrose that I took numerous photos of last year. It also had numerous flowers and built up a long stem.  It, too, was quite sheltered from the sun rays as it received protection from that rotten, termite infested log that was sitting on the edge of an old wood pile.  It looks like some animal tore apart the log to try to find some food this winter.  The primrose is in the center of the picture, that lump next to some green grass.  I still need to cut off one of those old seed pods and see if there are any seed left inside that have scattered.  I've tried removing a pod in the past but that is one tough plant and fingernails just couldn't do the job of cutting through the fibers.

Tuesday, February 25, 2014

My Jacob's Ladder Quilt Project.

Tuesday and I'm finally ready to tackle some more projects.  One ongoing project has been putting together a number of Jacob's Ladder blocks to simulate an old family quilt.  I have 3 variations going on at the moment and decided that more blocks were needed for each variation.  Picked up more fabric for the blocks this past weekend at my guild's quilt show.  Had a little time to sit at the computer and figure out how many colored pieces that can be cut from 1 fat quarter (18" x 22").  Had to do it that way as my brain just doesn't seem to want to figure it out. Results show that I can make 3 single colored blocks from 1 fat quarter used with same amount of muslin or another light or dark color as the background.

I used 3 colors to show what is needed for each block.
The separate colors represent the colored pieces for 3 blocks with a little left over. Ideally, one would end up with 2 extra 2 1/2 " squares and a 2" strip for use elsewhere. plus a 1/2" strip as waste unless you're into using that small a scrap (maybe as a small package tie-wrap?).
This diagram is marked for making three 12 1/2" unfinished blocks which uses  4 half square triangle units per block  and  10 2 1/2" squares for the 4-patches per block.  You'd need the same amount for the background.

 The half square triangle units are marked as 5" blocks to start with to be layered with a 5" block of muslin then diagonal marked and 1/4" seam sewn on both sides of the diagonal line. Then cut apart on the diagonal line which leaves you with twoapproximately 4 1/2" half square triangle blocks (you'll need to trim the sides to fit to that 4 1/2" measurement).

hmmm!  I could layer the fat quarter with the muslin and get some of my sewing done before cutting it out.  All I'd have to do was mark the fabric a head of time!  I think I'll try that out and see how it works.

Meanwhile,  here's what 1 single color block looks like:


And here's a view of the old, well worn family quilt:
     
I've picked up some fabric to use as a sashing & corner stones for 2 of the 3 quilts I'm doing.  Haven't picked up fabric for the backing yet.  Not sure if  yellow will be used for the back.  Maybe on one or two of the quilts?

 Now to get on with my other projects for the day - posting the winning quilts from my guild's show on our website.

Continued in # 2

Thursday, February 13, 2014

Brushing again...

Had some repair sewing to do today.  Diamond came in to "help," first finding a ball of yarn to play with.  Had to stop and wind that up


That settled, sewing commenced.  Diamond got on the table to watch, then decided to go sleep behind the laptop for awhile.  Meanwhile, I was back to sewing and almost finished with the patch repair.  Just one more line of sewing.

 That's when Gypsum came in.  He did his usual. Sat and looked at me from the floor, then gave a little meow.  I relented and started brushing him. Oh, wait, I have to get that sewing done so I can get off to the P.O..  I stop brushing.  Gypsum is not happy and starts his paw routine.  I relent and brush a few strokes more.  He's really enjoying it.  I stop again and this time turn around quick and start sewing.  He's NOT happy.  He does the paw routine but this time stretches out the nails and then curls them in... in MY leg  I yell, he runs.  I grab the nail clippers, find him and give him a really needed nail trim and a few more brush strokes... which didn't interest him anymore.  So, back to finishing the patch repair and off to the P.O.


Tuesday, February 11, 2014

Update on Brushing

 A couple of glitches kept me from updating this last week.  Got those cleared up - well, one of them for good but the other is in limbo as far as I'm concerned.  Meanwhile back to brushing the cats.

Last week, Butch seemed to want to make daily brushing a part of his routine, too.  And now Diamond seems to think it's the THING to do!   Gypsum still comes in but we were gone for 4 days and Gypsum forgot to come in this morning though he made sure I brushed him 4 different times last night after we got home!  He has since come in this afternoon for those brushes.

Here's a sequence of photos of Butch getting his brushing.  I had to keep him from falling several times.
Butch really gets into being brushed.
Butch loves the brush around
his mouth and chin.

and rub on the sewing machine while the
 brush is going down his back.
Brushing those cheeks feels so good.

He just rolls with ecstasy, almost off the table

and ends with belly rubs, still trying to
 hold his balance on the table.


Diamond watched and when he was finished & left the room, she hopped up on the table and asked for some brushes.  But when the camera came out, she hid behind the laptop, content to give herself a bath.  I did manage to get a couple last week though.

Here's Diamond enjoying the chin rub.


Doesn't she look like she's really
 enjoying it?